
InterfacingFlexSensorwithArduinoServoCircuitDiagram Electronics Go
1 Arduino IDE Project description Connecting Flex Sensor With Arduino and Servo Motor All About Flex Sensor in 8 Min | Basics | Working | Arduino | Interfacing | TinkerCAD Simulations About Flex Sensor Flex sensor is a flexible resistor, it has two pins. Whenever you bend it, its resistance changes.

[Project 15] 5 Flex Bend Sensor + 5 Servo Motor + Arduino12
The sensor bends in one direction and the more it bends, the higher the resistance gets; it has a range from about 10K ohm to 35K ohm. In this circuit we will use the amount of bend of the flex sensor to control the position of a servo. Parts Needed. You will need the following parts: 1x Breadboard; 1x RedBoard or Arduino Uno; 1x Flex Sensor.

Interfacing Flex Sensor With Arduino And Control Servo Motor And Led Images
In this video, you will learn How To Control Servo Motor With Flex Sensor using arduino.Components required to make this project are :1) Arduino UNO2) Arduin.
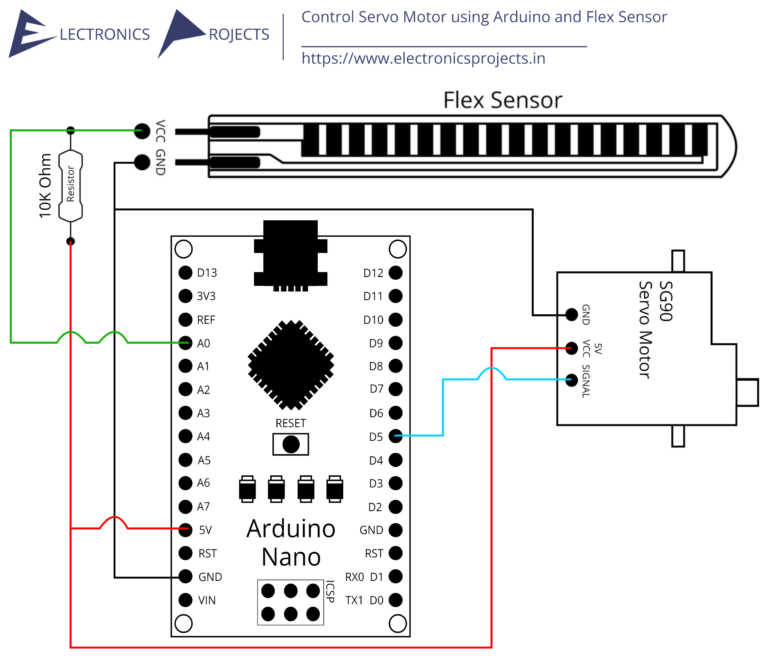
Control Servo Motor using Arduino and Flex Sensor Electronics Projects
Servo Motor Control with Flex Sensor using Arduino In this tutorial we are going to develop a circuit using FLEX sensor, Arduino Uno and a Servo motor. This project is a servo control system where the servo shaft position is determined by the flex or bent or deviation of the FLEX sensor. Lets first talk a bit about servo motors.

rekaregister Blog
A flex sensor is a low-cost, easy-to-use variable resistor that is designed to measure the amount of deflection it experiences when bent. The sensor's resistance is lowest when it's flat on the surface, increases when we bend it slowly and reaches its maximum when it's at a 90-degree angle.

Arduino Tutorial How to control servo motor with your finger by using
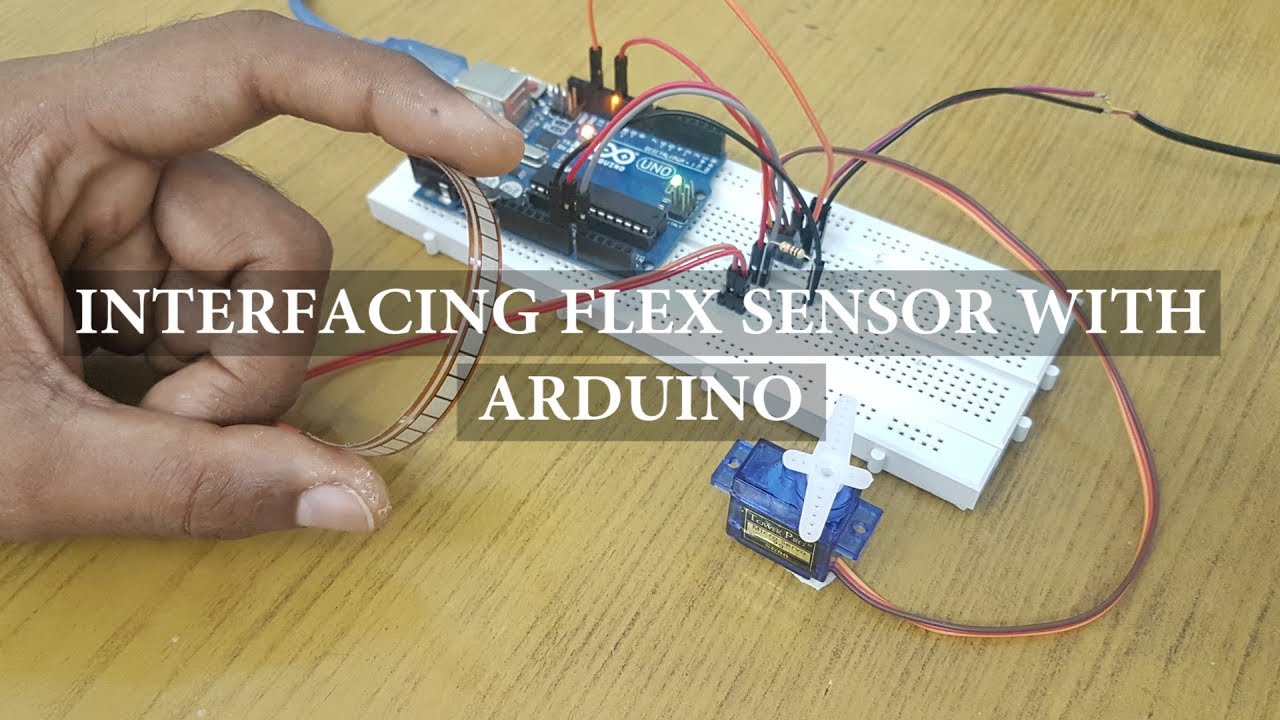
This video shows how to interface a Flex Sensor with Arduino and finally control the Servo Motor with Flex Sensor, which shows the following: # Components# C.
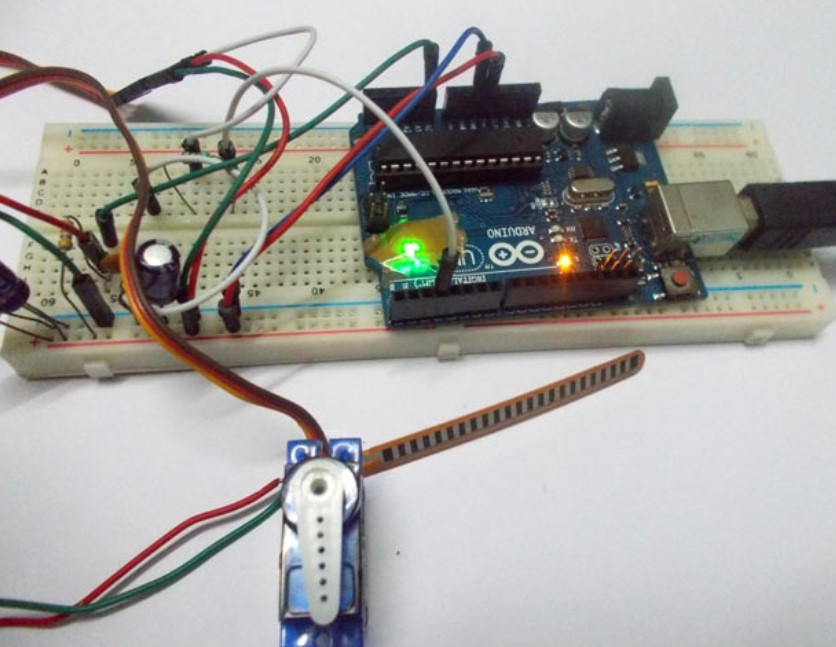
Servo Motor Control by Flex Sensor Arduino Mini Project
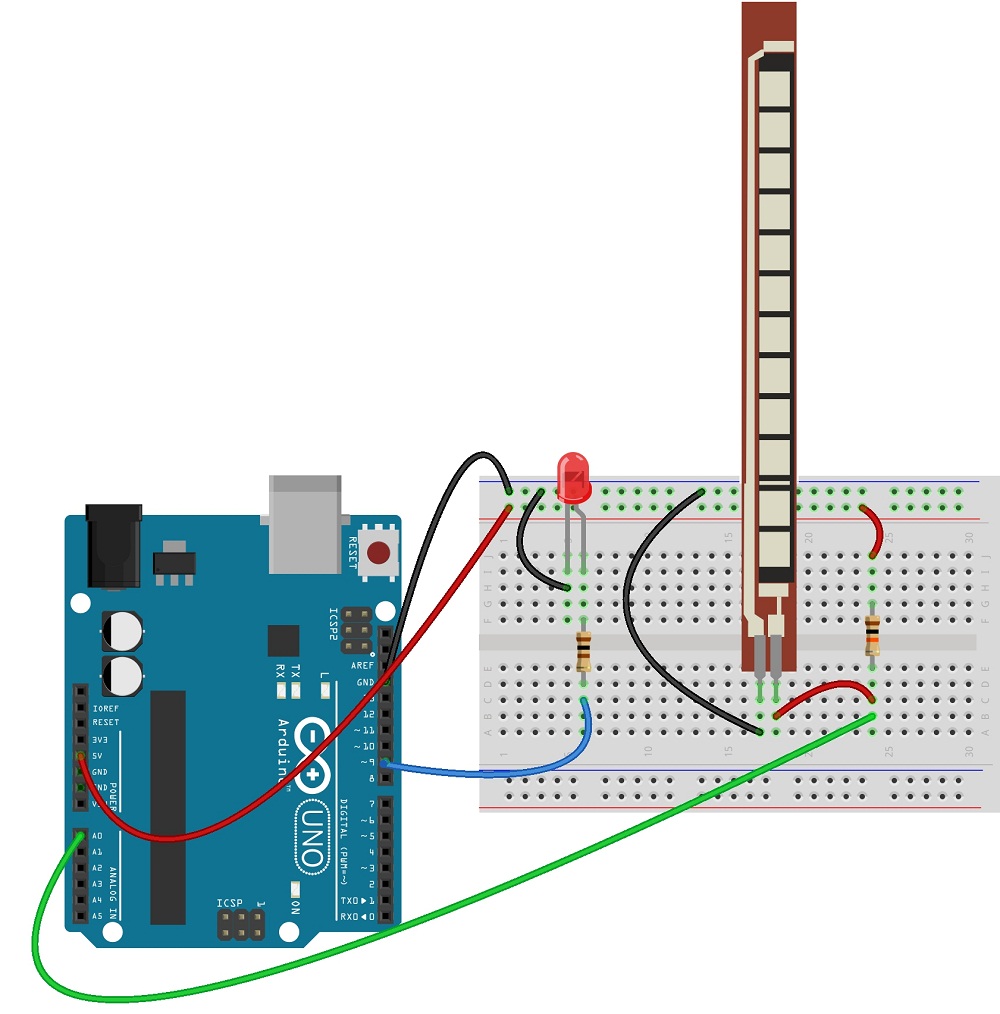
Arduino Interfacing Flex Sensor with Arduino - Hookup Guide and Servo Control July 12, 2018 By In this project, we will learn about Flex Sensors, how a Flex Sensor works, how to interface a Flex Sensor with Arduino and finally control devices like LED and Servo Motor with Flex Sensor and Arduino. A Brief Note on Flex Sensor What is a Flex Sensor?

Interfacing Flex sensor With Arduino and control Servo Motor and LED
Servo Motor Control by Flex Sensor. In this tutorial we are going to develop a circuit using FLEX sensor, Arduino Uno and a Servo motor. This project is a servo control system where the servo shaft position is determined by the flex or bent or deviation of the FLEX sensor. Lets first talk a bit about servo motors.
Flex Sensor with Arduino theoryCIRCUIT Do It Yourself Electronics
Record the analog input value by bending the sensor from minimum to maximum. The servo motor need angle in degrees from 0° to 180°, but the sensor data can be any value from 0 to 1024. Use to the below code to convert the flex sensor value to proportional servo motor angle. int const min_flex_val= 159 // analog input value for straight sensor.
Interfacing Arduino With Flex Sensor and Servo Motor Arduino Project Hub
Flex Sensor or Bend Sensor with Arduino, Interfacing and Programming- If you've ever been curious about how to work with a flex sensor and how to use it with Arduino, you're in the right place. Because in this article, I will be explaining the most basic and advanced things with the help of three examples.

How to control servo motor with your fingers by using Flex sensor
Flex sensor is a transducer which changes its resistance when the linear surface is bent. Hence the name flex sensor. Simply speaking the sensor terminal resistance increases when it's bent. This is shown in below figure. This change in resistance can do no good unless we can read them.
Interfacing Flex Sensor With Arduino To Control Servo Motor YouTube
Control Servo Motor using Arduino and Flex Sensor > Projects List > Control Servo Motor using Arduino and Flex Sensor Control Servo Motor using Arduino and Flex Sensor April 23, 2022 January 23, 2023 Projects List / Arduino Nano Projects 8 mins read Post Views: 26,081 Description:

Flex Sensor & Arduino Interfacing Measure Bend/Resistance
Servo Motor Control by Flex Sensor. In this tutorial we are going to develop a circuit using FLEX sensor, Arduino Uno and a Servo motor. This project is a servo control system where the servo shaft position is determined by the flex or bent or deviation of the FLEX sensor. Lets first talk a bit about servo motors.

Servo Motor Control by Flex Sensor using Arduino Uno YouTube
A flex sensor is a bendable resistor that changes its resistance based on the degree of bending. By connecting a flex sensor to an Arduino and using it as an input, we can control the position of a servo motor. This opens up possibilities for projects that require precise control over the movement of mechanical components. Hardware Required

Flex Sensor Interfacing Flex sensor With Arduino and control Servo
Interfacing Flex Sensor with Arduino - Hookup Guide and Servo Control Guides and How To In this project, we will learn about Flex Sensors, how a Flex Sensor works, how to interface a Flex Sensor with Arduino and finally control devices like LED and Servo Motor with Flex Sensor and Arduino. A Brief Note on Flex Sensor

Arduino with a flex sensor and a servo YouTube
It controls the angular position of the motor as per bending of flex sensor - means more the sensor is bent more the angle at motor rotates and vice versa. The project is build using Arduino UNO development board and it uses 2.4" flex sensor along with micro servo motor. Fig. 1: Prototype of Arduino and Flex Sensor based Servo Motor Angle.